Solo Mid – Introduction
Two factions contest to destroy the other. Each team consists of a group of five, each taking on a role. No role should be left unfulfilled nor should one role be repeated. Each role guards one of three lanes connecting both bases together. Today, I’m taking you to the middle of the battlefield. Face your foe in a duel for the shortest route! You are the second carry, the Solo Mid!
DOTA 2 – Solo Mid – Position 2
Goal
You are the vanguard of your team. The middle lane is a 1 on 1 duel between you and the enemy. You have two responsibilities as a Solo Mid:
- Secure your lane. Your job is not to destroy the enemy tower first but to make sure that your lane does not get pushed until the mid-game. The early game is the slowest paced portion of the match so keep yourself stocked with restoration items.
- Grow rapidly in terms of level-ups. The entire reason you are called ‘Solo Mid’ is that your allies are supposed to give you room to grow. If you ever have an allied hero in your lane, the experience gain will be split between you two. Learn when to leave the road to farm on nearby Neutral camps. Stay idle in the middle and you waste time. Stay too far and you will give your enemy room to push against your tower.
The middle lane is the shortest route to travel between the two bases. Leaving your post at the wrong time can be detrimental to the balance of the match for the rest of the game. Stack up on restoration items, and make use of the courier as much as you can.
Tactics
Basics
The top lane is the safe lane for the Dire because the tier 1 tower is closer to where the creeps will meet. The bottom is the safe lane for the Radiant for the same reason. The middle road is where everything is equal for both sides. True to all lanes, your use of the tower plays a huge factor with how you can do your job. The difference between the middle lane and the side lanes is how involved the mid position is with the enemy.
Creep Blocking
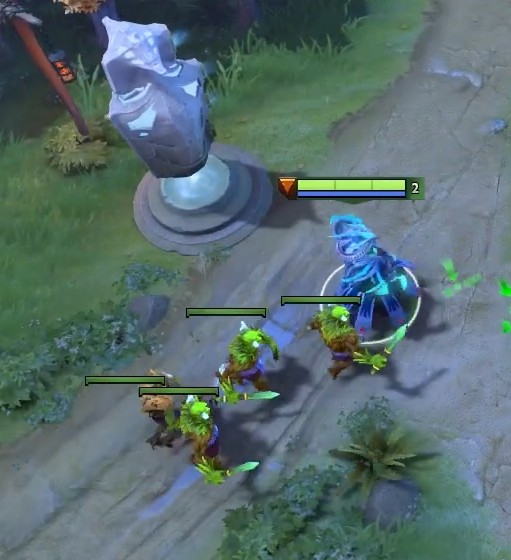
As soon as you spawn at the beginning of the match, position yourself by the entrance of the base facing the middle lane. Don’t go too far, just stand a bit close to the tier 3 tower. This is where you will wait for the lane creeps to spawn. These are mindless soldiers that walk a straight path to the battlefield. Stand in front and move forward little by little. You will notice that the lane creeps will try to walk around you but couldn’t because you are standing in their way. Does this remind you of an annoying moment in your life when a person is moving slower than your own pace but moves enough that you cannot overtake them? This is called ‘Creep Blocking’, and believe it or not, this is an essential skill to give you the advantage on your lane.
The entire point of creep blocking is to slow down your own creeps’ movements. Lane creeps will keep moving forward towards the opposition’s nearest structure. They will not wait in the middle ground for a fair fight. Holding back your creeps makes the two opposing forces meet closer to your side of the map.
Accuracy and Slope
I see you are wondering: ‘But isn’t the point of the game to push deep towards the enemy territory? Wouldn’t it be more ideal if we let our soldiers march as quickly as possible instead of holding them back and letting the enemy set foot in our territory?’ The point of the game is to destroy the enemy Ancient, but you cannot rush that. What you can hasten is your ability to grow in both money or experience points. Killing creeps is one of the best ways to do that in this early in the game.
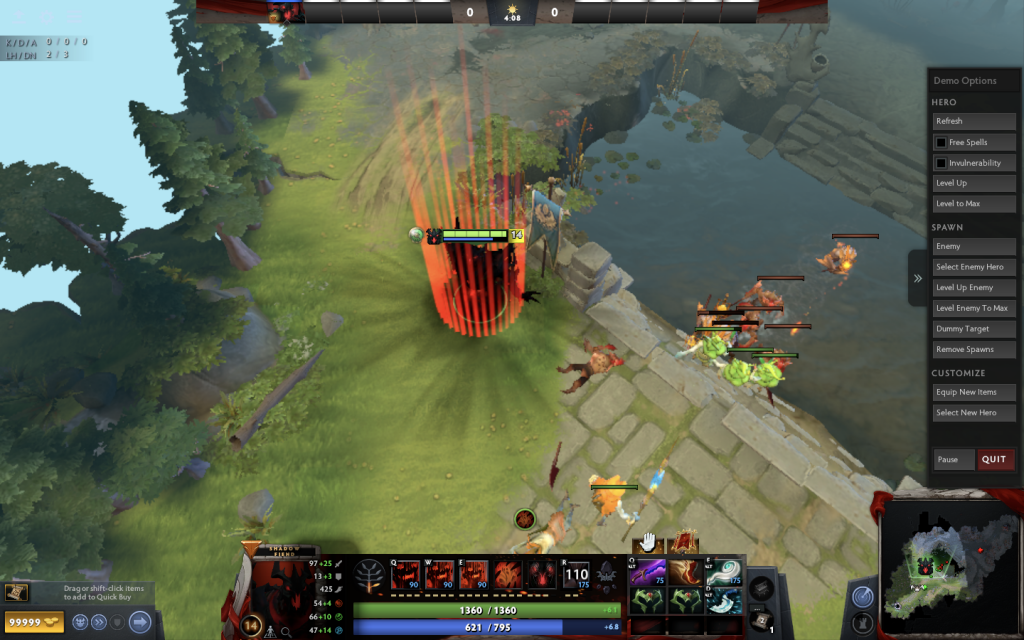
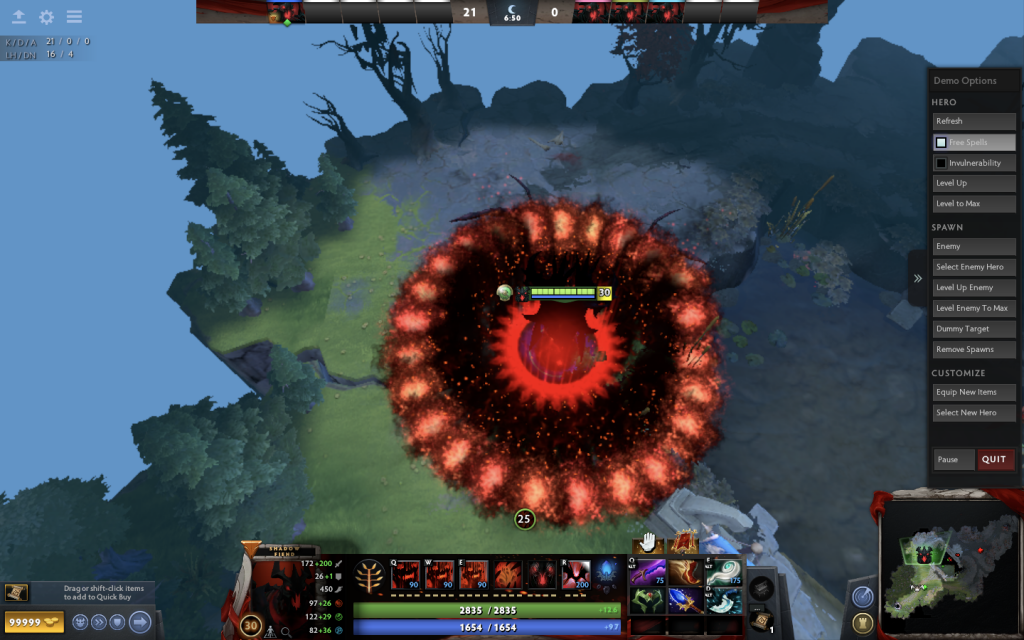
I will also say that it will not be the tower that you will be using at the start. At the centre of the map, the place where the first wave of lane creeps was supposed to make contact, is a downward slope towards the river. In DOTA 2, ranged units attacking units in an elevated platform has a high chance of missing. A missed attack is a wasted second or two. The entire reason you want to take the fight close to your slope was to have the melee-creeps fight in an elevated platform.
The enemy’s ranged units, both creep and hero, will have a low accuracy if they attack from a lower platform. Meanwhile, units from the higher ground will have normal accuracy, making creep killing as easy as fighting on even grounds. Your side of the river is also close to your tower. Even if the enemy hero decided to climb your slope, they will be within the tower’s attack range. This brings me to my next point.
Tower Hug
One of your jobs is to protect the tower, but this structure is here to protect you. If you look closely, you will notice that being close to a tower gives you +2 Armour. Other than that, this immobile chunk of rock can attack within a long-range. The same advantage is true for the enemy team. These towers will attack the first unit that comes within range until that target dies, and it will look for the next closest enemy. The tower will prioritize protecting itself and so should you. However, instead of scrambling to try and kill attacking units, take notice of what the tower is attacking.
Last Hit
Towers attack fast but not as strong as your own damage output. Let your tower weaken creeps then pick off the ones that are dying. You are essentially ‘stealing creeps’ from the tower. You can apply this rule to creeps about to be killed by your own creeps. Always aspire to be the one who kills. A unit’s death rewards the one person who delivers the final blow, that includes enemy heroes and neutral creeps.
When a hero attacks, there will be a short delay before the next attack. These short intervals in between animations are affected by Attack Speed. Because of this delay, you cannot always guarantee that your next attack will be the hit that kills a unit. Veteran players are aware of this, which is why they don’t let their heroes attack automatically. The most important blow is and always will be the last hit.
Items to take in your inventory
You can’t leave your lane so you have to consider restoration items for both mana and health. You also can’t let yourself be outplayed so you need to cover your Attributes, too. What to do? Fret not, you have a courier!
Each faction has a courier, a unit that can be controlled by every member of the team. When you buy items the courier can approach the shop in your stead then have your purchases delivered to you no matter where you are on the map. As the solo mid, you are given top priority to use the courier for most of the early game. This is because you are expected to never leave your lane unless you are farming in the jungle, which is also a dangerous place in lower levels. Don’t worry about your teammates, the side lanes have shops close to them selling armaments and consumables.
With your starting money of 600 Gold, focus on your longevity. Carry heroes are generally strong enough to kill creeps through active abilities or a strong basic attack. Take a Tango for 90 Gold and a Healing Salve for 110 Gold, that’s 200 Gold worth in health restoration items.
All heroes in DOTA are reliant on mana for abilities, especially in lower levels so always consider mana restoration. If you are using a mana hungry, close-quarters hero such as Dragon Knight, take two Enchanted Mangoes for 70 Gold each. One mango restores 125 mana instantly but increases your regeneration for 0.6 per second when kept in the inventory. The mango’s passive ability stacks with itself so some consider taking three at the start of the game. If you are using a long-ranged and cautious hero such as Lina Inverse or Sniper, you can take the Clarity for 50 Gold which regenerates a total of 225 mana over time instead of instantly. You can use the rest of the money to focus on your Attributes.
Always take a Circlet for 165 Gold as that item gives +2 on all Attributes and a component for each of the three early game upgrade. If you plan to build a Wraith Band (for Agility), Bracer (for Strength), or a Null Talisman (for Intelligence), check the components of the one you wish to get next and buy them first except for the recipe. The recipe costs 215 Gold, building the upgrade to start the match will leave you no money to buy restoration items. Always prioritize your restoration. Besides, you shouldn’t take an upgrade until you see your opponent. Build your items in response to what playstyle you can expect from an enemy hero.
If you are up against an active ability user such as Lina Inverse or Shadow Fiend, both constantly spam abilities against creeps, you can consider buying two or three Iron Branch that costs 50 Gold each. Each branch gives you +1 on each Attribute and it stacks with itself. You can upgrade two Iron Wood branch into a Magic Wand early. When facing against a hero more reliant on basic attacks such as Dragon Knight or Blood Seeker, consider overpowering them with Attributes.
To recap, must-have items are 1 Tango and 1 Healing Salve. If you are using a melee hero with low mana pool with quick abilities, take two or three Enchanted Mangoes. If you are using a ranged hero that uses many abilities to quickly keel creeps, take a Clarity Potion and buy the next with your courier. If you are fighting against a melee hero, buy Circlet and two Attribute items that are components for the Attribute upgrade you need. If you are up against a ranged spell user, take a Circlet and two or three Iron Branch. That’s about all your starting money can get you.

Early Game
Deny
You will be contesting for creep kills in your lane. The attack that kills the target gets the money and experience. Besides killing the enemy creeps, you must also kill your own. This logic also applies to the towers. You can deny your creeps by right-clicking on them, just as you would with an enemy. Killing your own units robs the enemy the gold and experience and rewards you with a small amount of each. Time your attacks right, and you will level up faster while also slowing down your enemy’s growth.
Early Builds
Early builds are situational between what hero you are using, what items you started with, and who you are fighting against. If you find yourself needing to contest for the last hit, take a Quelling Blade for 200 Gold and have it delivered by your Courier. If you wish to harass the enemy off the lane, take Attribute upgrades such as Wraith Band, Bracer, or Null Talisman. Each Attribute upgrade costs 515 Gold in total but we’ve talked about taking a Circlet and another component with you so you only need to pay 215 Gold for the recipe. Lane creeps are actually generous with Gold rewards if you delivered your last hits properly so you can get both recipe and Quelling Blade in one go… but don’t do that. Prioritize Boots of Speed as soon as you can more than the Quelling Blade. Your mobility is the key to cover more grounds or escape enemy range. Remember to replenish your restoration items, dying is never an option and retreating is only allowed if the enemy fled first.
To cover both stats and recovery, you can build Magic Wand as an early game upgrade as an alternative to Attribute specific upgrades. The Magic Wand gives +3 to each Attribute and has the ability to stack 1 charge for every time a nearby enemy casts an ability, the maximum charge is 20. It has an active ability that uses up all charges to instantly restore +15 each to your health and mana multiplied by the number of charges lost. Even if you only got 10 charge, that still restores better than the tango and the mango combined. The mid lane is where the heroes compete for creep kills or harass each other off the lane so you can expect many abilities being used.
Jungling
You cannot always push lane creeps especially when the clash is near the enemy tower. By level 3 or 4 with restoration and attribute items, you can roam in the jungle and farm neutral camps. These big monsters give more money and experience than lane creeps so you can guarantee a constant growth while your lane is too dangerous to return to. Careful not to meet an enemy hero, the jungle does not favour any side. Even if the jungle is technically within your faction’s territory, you will not have creeps or towers to assist you.
Always use your abilities in farming. You will not waste mana if you are using your hero’s powers to avoid wasting time. Time is more important than anything. You can restore health and mana with cheap consumables, but wasted time could factor in the gap between you and your enemy’s growth.
Building Towards Mid Game
Early Game lasts only until the 10-15 minute mark. By this time, you are expected to have an upgraded pair of boots, multiple Attribute boosting upgrades, or one Artifact upgrade. You can have a Bottle from the Secret Shop and a Magic Wand to cover your restoration properties instead of purchasing Tangos and Mangoes. You also have fountains in the jungle that can restore your health and mana to full should you need them.
Mid Game
I would love to give a general rule of thumb, but DOTA 2 is a complex game. What happens beyond the time you reach level 6 is entirely dependent on what hero you use, who you are fighting against, how you play, how well you secured your own lane, and how good your teammates are doing in their lanes up until this point.
Every hero has a core item build specifically tailored to optimize the efficiency of their skills and intentional design. Slowly build towards your core build from the early game and expand on it by the late game.
Veteran players, however, would find their own interpretation of the character. In using any hero, you should always consider the following things in figuring out what items to build:
- Mobility
- Damage Output
- Survivability
Mobility
Movement Speed affects your ability to roam across the jungle and chase down. It is at this time that killing creeps in lane and jungle becomes too simple.
As the mid lane, you are in the best position to gank in either side lane. You can no longer expect each lane to mind their own. All heroes trying to cover all three lanes will result in a ‘Dead Lane,’ a term referring to the act of spreading the team’s power evenly across the map, resulting in the loss of efficiency and high risk of exposure from enemy ganks.
Monitor who’s dead from either side. Taking objectives with enemy heroes missing or lack of backup will be foolish because enemies could appear out of nowhere and surround you. If you are unsure with your situation, gank the side lanes.
You can see the enemies in a state of Dead Lane from the minimap if all heroes are present. Leave your lane and help kill the side lane enemies, granted that your allies are in their lanes as well. Help kill enemies or destroy the tower, then head back and defend your own territory.
Damage Output
Each hero is dependent on their attributes due to the primary attribute directly affecting Attack Damage. You decide what item to build based on what kind of damage your hero uses most often. There are three types of damage:
- Physical Damage: refers to any attack that can be blocked by the enemy’s base armour and pierces magic immunity. All basic attacks deal physical damage while only some active abilities do. Heroes can turn ethereal which makes them completely immune from physical damage of any kind. Attack damage can miss heroes with high evasion.
- Magic Damage: cannot pierce magic immunity but gets amplified against ethereal enemies. Magic Damage is reduced by magic resistance instead of base armour. Most active abilities deal Magic Damage and are reliant on heroes’ Intelligence Attribute because they are not affected by the base attack in any way. Evasion is useless against this kind of damage. Damage-over-time status applied by basic attacks can pierce magic immunity even though they cause Magic Damage.
- Pure Damage: completely ignores armour, resistance, and evasion and pierces through magic immunity. Ethereal enemies can be hurt by Pure Damage. Some abilities can unleash this kind of output from the get-go while some are requires upgraded items such as the Aghanim’s Scepter.
Your damage output greatly influences your ganking prowess as well as your usefulness in a fight. As one of the three carries, you are expected to kill at least one enemy for each time your team clashes. If you cannot kill an enemy carry, it is likely that your team will have casualties. You think creeps give so much money and experience? Imagine how much a hero is worth. Dying also takes away some of the fallen hero’s unspent money, slowing down progress while strengthening the killer.
Survivability
You should not die, but as a carry, you will always be a target. While roaming the jungle, or during a clash, you cannot guarantee that supports can aid you. You will not have the time to decide between running away or standing your ground. Your flight or fight response will be honed as you play more but your knowledge of what options you have factors deep in your instincts.
Always be mindful of the amount of health and mana at all times. Every hero is expected to have a Bottle in the mid-game. A Magic Wand should be a staple for mid laners but you can switch it with anything you find more useful, as long as you have mana and health to cast your abilities.
Other than restoration, you will also need resistances. Black King Bar is a common mid-game item that grants temporary magic immunity and 100% magic resistance when activated. The cost is 4075 Gold in total, but it will save you from a quick death. If the enemy uses a Black King Bar, it is futile to start attacking them so direct your attention at another enemy or run. The damage and strength increases from this item are not great and the active ability shortens the duration for each time it is used. Consider selling Black King Bar in during late game to make room for a more situational item.
Late Game
At this stage, all heroes have started reaching the level cap of 24 and fill their inventories with core items. The advantages either team have garnered through the early game and mid game are now obsolete. Each player has started recognizing enemy fighting patterns. It is time to end the game!
As a carry, you lead the rally towards enemy towers. Careful about the tier 3 towers, not only are they stronger than the first two you destroyed in the mid-game, but they are also in an elevated platform. Never try to dive-in alone, always take two teammates with you when pushing lanes.
If you can’t push lanes, kill enemy heroes one by one or all of them if you can help it. Your core build can be expanded into more powerful upgrades to make room for utility items to respond better against situations you have trouble with. Do you have an enemy that can nuke you? Take a Linken’s Sphere that blocks a spell, making you completely unharmed from an otherwise fatal blow. Are you using a character that can attack in quick succession and you want a way to make your attacks deal more damage? Buy a Divine Rapier, the item that gives a whopping +330 attack damage increase, the highest damage boost in the game!
The key to a push is to remove enemy heroes from the map. The best way to kill them is by making sure that they do not kill you or any of your allied carries.
DOTA is a game of many possibilities, one hero can hold back an entire team of five if used correctly. If you find yourself taking the defensive, secure your lanes. Focus on killing lane creeps to slow down their push and run away from enemy heroes so you don’t die yourself. Dead heroes can take a maximum of 3 minutes to respawn in the late game. At least one hero in the defensive team can buy enough time to change the tides.
Good Heroes to Start With
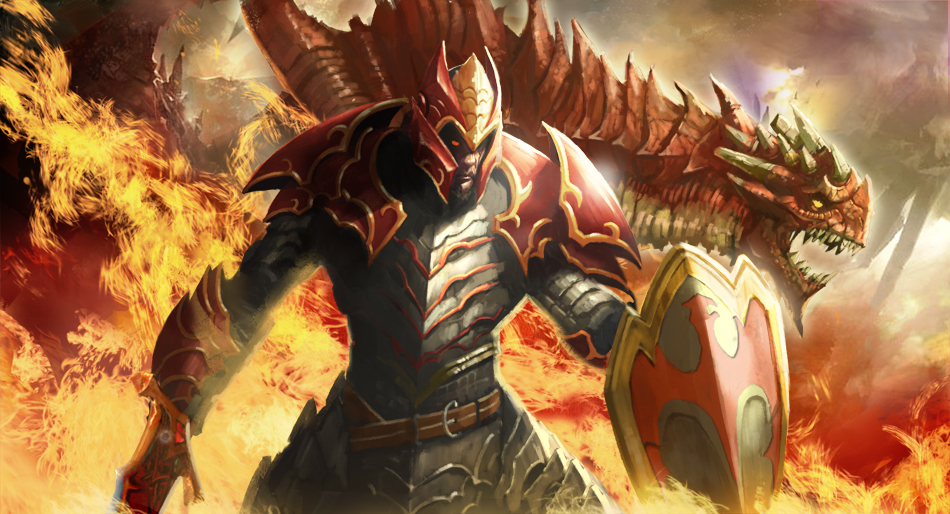
Dragon Knight
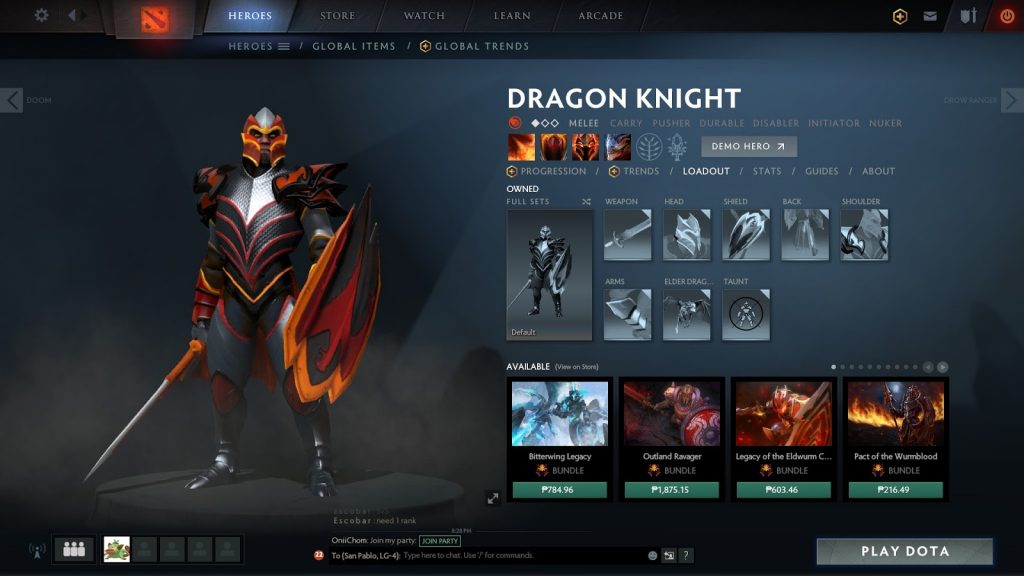
Start off with one of the most basic heroes, Dragon Knight. This guy has an innate thick defensive skill brought by being a strength hero. The passive ability Dragon Blood also gives Dragon Knight a considerable boost to his base armour and health regen. This tanky knight guarantees that you last in your lane for a long time. As we’ve discussed, you cannot let go of your lane so longevity is a priority just as much as farming.
Speaking of, Dragon Knight’s first ability, Breathe Fire, dishes out a long and wide wave of flames towards a target direction. This fire breath costs a huge amount of mana. I would say ‘use sparingly’ but with Dragon Knight’s strong defence and fast regeneration, you can buy Mangoes to restore your mana instead of focusing on Attribute at the start of the game.
Dragon Tail is a stuns an enemy for the same mana cost as Breath Fire but only reaches as far as your melee. Many beginner Solo Mid players will choose a ranged hero so Dragon Tail’s short activation reach. With this ability open, however, enemies will not dare approach you. Stun your enemy at the right moment like being close to your tower or surrounded by creeps. If your aim is to harass, Breathe Fire is a better choice.
At level 6, you will have access to Dragon Knight’s Elder Dragon Form. Your hero can transform into a Green Dragon with increased movement speed and your melee attacks will be replaced by a long-ranged Corrosive Breathe that deals poison damage-over-time. This new offensive power works on structures such as towers and barracks, too. Level up your Elder Dragon Form and you become a Red Dragon adding splash damage with 300 units radius to your corrosive breath. Another level up turns you into a Blue Dragon that slows down the movement speed of enemy units hit by your already vile attacks. The skill Dragon Tail also acquires the range of your attacks.
Lina Inverse
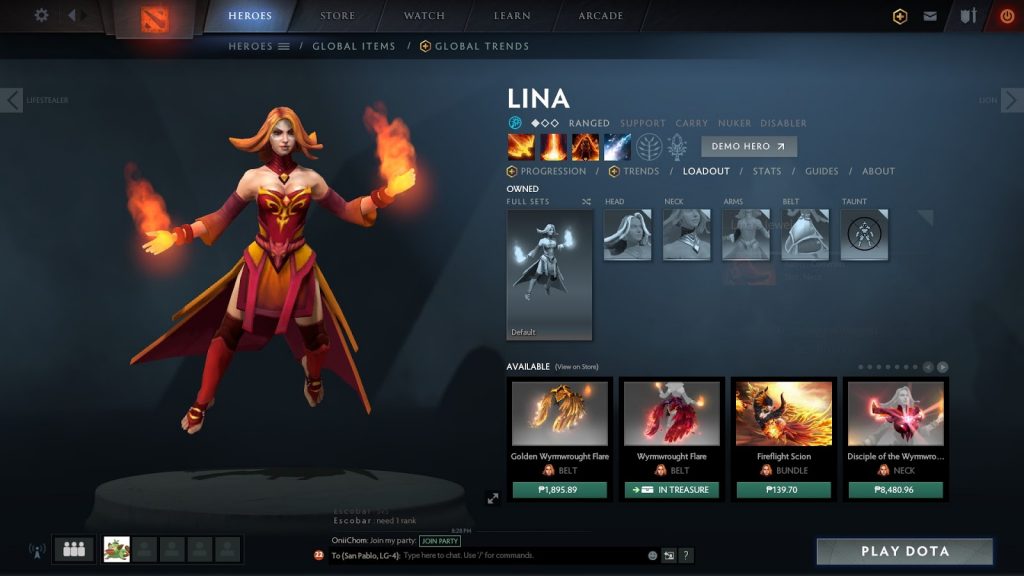
Lina is a less tenacious hero, in the sense that she does not have any innate defensive ability at all. What she does have are long-ranged, heavy damaged spells and a large mana pool.
Lina can clear out waves of creeps or harass enemy heroes with a forward wave of flame. This ability is called the Dragon Slave and it reaches up to 800 units, damaging all enemies it passes through. She can do the same with her other skill called Light Strike Array, but this one affects a small circle with a column of flames. The more focused skill stuns all affected units and deals damage as potent as the first ability.
Lina’s passive, Fiery Soul, increases her movement and attack speed for 10 seconds. This ability stacks with itself so it is ideal to spam her skills then let her finish off the enemies with normal attacks. Exhausting Lina’s mana pool can be dangerous as she does not have much utility outside her spells and buff.
Laguna Blade is Lina’s ultimate and most potent spell. This is a bolt of lightning with all her might focused on to a single target, perfect for finishing off a tenacious quarry.
Queen of Pain
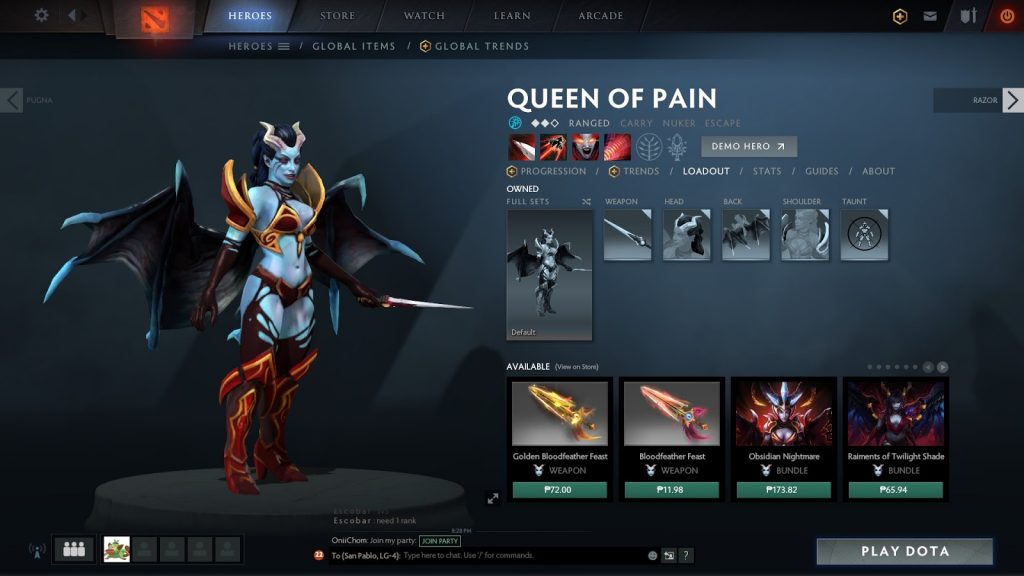
Queen of Pain tends to be more intimate with her opponent while keeping her distance like a tease. Her basic attack involves tossing knives at enemies but a special knife can be hurled using Shadow Strike. The target enemy takes more damage than the normal attack. Target becomes injected with a poison that hurts over time and slows down movement speed.
Queen of Pain can move in and out using Blink. This perfectly sets her up before using the Scream of Pain. The latter ability deals a quick motion of a damaging wave against enemy units surrounding Queen of Pain. Blink her at the centre of creeps or close to an enemy hero, then activate the deafening screech.
Sonic Wave is a special scream that travels forward in a wide cone. All units will be dealt a heavy blow of true damage, piercing magical immunity or base armour.
Sniper

Sniper guarantees you have the longest range in the early game with his Take Aim passive. This range can be far enough that you can attack enemies while hiding behind the fog of war. His basic attack is specially designed to allow you to hide and ‘snipe’ enemies from cover.
His Shrapnel ability rains down a stream of burning pellets at a circle, damaging units within the range over time. This also reveals the affected area if cast on an area out of Sniper’s line of sight.
Headshot is another passive ability that grants Sniper a chance to apply a stun and extra damage on a target. Assassinate is the ultimate ability that will have Sniper lock on to a target enemy hero for a time. The range reaches up to 3000 units away. When Sniper is ready, he’ll pull the trigger and strike the target for massive true damage, piercing magical immunity.
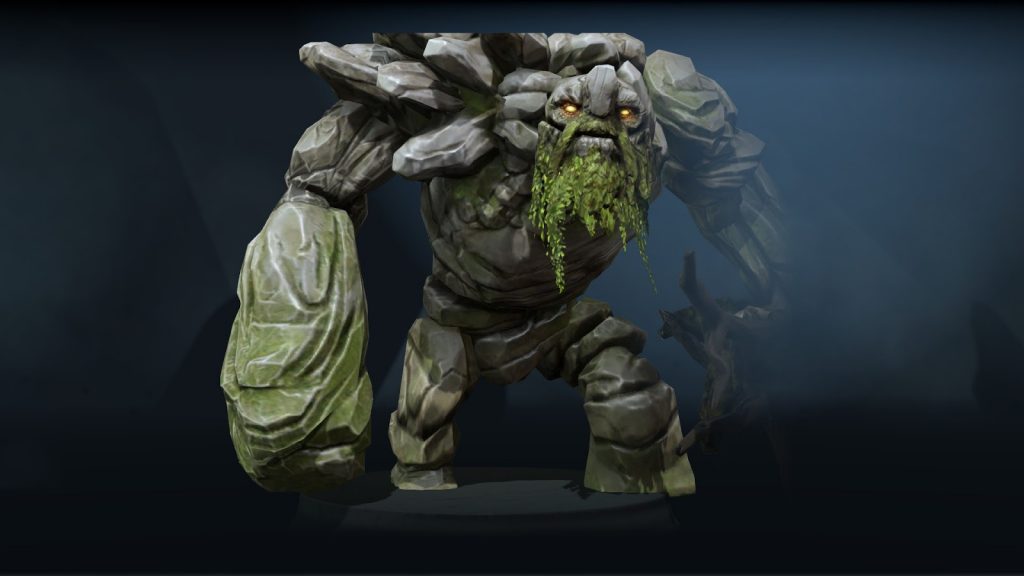
Tiny
Now we are back to the tanky melee kind of mid-laner. Tiny is probably the most fun to play for beginners and trolls alike. He is most notorious for the ability Toss which allows you to literally ‘toss’ a unit at another target unit, dealing area of effect damage as your chosen projectile land. You can hurl any unit, creeps or heroes alike, whichever is closest to Tiny at the time of activation. If you tossed an enemy, that poor soul will also receive damage when it lands.
Tiny’s Avalanche makes rocks roll at a wide area, dealing damage and causing units to get stunned. This ability gives Tiny a good area coverage for clearing creeps and controlling enemy groups in a clash. This also works in conjunction with the Toss ability. Cast Avalanche on an enemy hero then quickly toss the same unit still within the range of the Avalanche that is still in effect. The immobilized player you just toyed with will receive Avalanche damage and stun two times: before they were tossed and as soon as they land.
Another fun thing you can do with Tiny’s two skill combo is Toss the enemy hero close to your tower then cast Avalanche. Given that these two skills are not ultimates, you can do these combos at level 3. Even if you don’t kill the enemy mid laner, this stunt can take away much of the opposition’s health. Any advanced players know not to aggro a Tiny.
Tiny’s third ability is Tree Grab which allows Tiny to grab a tree to use as a club. Attack damage and attack range will increase and Tiny will have splash damage. The tree will only allow 5 attacks until it breaks. You can activate Tree Grab again to hurl the tree at a distant target, dealing Tiny’s base attack damage. The projectile log is considered physical damage, therefore cannot be blocked by Magical Immunity.
At the start of the game, Tiny is a small sentient pile of rocks with good mobility. By taking the passive ability ‘Growth’, Tiny will grow bigger and more destructive. At the cost of movement speed, you will gain a large increase in Armour and Attack Damage. This tradeoff is permanent so no purge ability can weaken your golem.