Hard Support – Introduction
A game of DOTA 2 must include 10 players per match. All participants will be divided into two opposing factions, the Dire and Radiant. Each team of 5 members take refuge in bases on two opposite corners of the map connected by three roads called ‘Lanes’.
DOTA 2 – Hard Support – Position 5
The lanes are defended by three towers each. The main objective is to destroy the enemy Ancient, which is guarded by numerous barracks and a pair of strong towers. It will take time before either team is able to attempt a siege, for now, you must grow. As the Hard Support, your job is to be the impenetrable shield until your carries become unstoppable forces.
There are 5 members per team. The positions 1, 2, and 3 are the carries and each one takes a lane to guard. Position 1 is the Hard Carry who is always vulnerable in the early game but a killing machine in the late game because of innate scaling abilities. This ally is in dire need of a backup from Position 5, you, the Hard Support.
Goal
The Hard Carry takes top priority in farm rewards. None of your other allies should try to take away creep kills from Position 1. The Hard Carry is expected to be the most dangerous member of the lineup so it is the Offlaner’s job to stagnate that progress. Your main job as Hard Support is to give your Hard Carry room to grow such as giving them the creeps. Drive-away the enemy Offlaner to remove competition for creep kills. You may also need to be wary of the enemy Utility Support as they tend to roam the nearby jungle or join the Offlaner in an attempt to kill your Hard Carry.
You don’t need to worry about your own attributes early as most support heroes have crowd control abilities. All the money you have will not be used on items for yourself. The items you pay for will be for the benefit of the carries like the courier. Focus on observer wards and restoration items you can give your Hard Carry. Worry about yourself by the late game, when the carries have created their core build.
Basics
The Support role is mostly brushed off by newbies who came to play for the glory of the carry. Veterans know full well the high impact of a good support player. All members are equally responsible for the outcome of the game.
You manipulate the battlefield. Dictate where the lane creeps should meet when you delay waves. Patrol the jungle so you can give your Hard Carry all the rewards of creep kills as well as securing the perimeters from unexpected ganks.
Laning
You can decide where the lane creeps should meet by delaying a wave. It is generally better if you can take the fight close to your tier 1 Tower. Delay your creeps by blocking them with your hero’s body. Move forward slowly because a complete halt will have the creeps move around you. The most effective way to delay your creeps is by pulling a nearby jungle creep from a neutral camp to meet your next wave of lane creeps. Attack any jungle creep to get the attention of the entire camp then let them chase you towards your lane. Stay there and endure at least one hit from the neutrals while a wave of lane creeps are present. Mindless minions of your factions are hardwired to focus their attack against an allied hero’s assailant.
Once the lane creeps meet with the neutral creeps, you can take the spoil by killing the neutrals or deny your dying allied units before you proceed back to your tower. This delay does two things:
- Force enemy lane creeps to advance forward, thereby taking the fight close to your tier 1 Tower. Towers also give +2 armour to nearby allies while also providing offensive support with quick and painful long-ranged attacks.
- Wait for another wave to form and march forward. If your first wave survived the clash with a considerable amount of health, they can survive the clash until the next wave appears. Your two waves now became one big group with two ranged creeps. This group can keep growing if the enemy doesn’t do anything about it.
Harass
The enemies will try to pressure you and your ally away from the creeps or even off the lane. Bully them back with powerful Area of Effect abilities. Most support heroes have AoE because these can help initiate combat or wear down creeps faster. Your other options involve abilities to hold down units such as snares and stuns. Have your carry take away as much of the enemy’s health. That being said, always keep mana restoration like Clarity Potions and Enchanted Mangoes.
Roaming
The jungle is a blindspot for either team. Allocate some budget for both Sentry Wards and Observer wards. Plant them in wide clearings or elevated platforms because these things can’t see behind trees or what’s above a cliff.
Another reason why you want to keep vision in the jungle is to avoid unexpected ganks. Pushing the lane far from the tower puts you and your carry vulnerable to a pincer attack. Given that Offlaners and Utility Supports have mobility reducing abilities, being surrounded away from the tower can mean a quick death. It’s okay for you to die, you don’t need many items besides consumables. But the Hard Carry cannot afford to die because death in DOTA 2 takes away a portion of your unspent Gold. Seconds of waiting for respawn are wasted time that could have been used to grow.
Essential Starting Items
Like all positions, you only have 600 starting Gold. Buy the Courier for 50 Gold and immediately deploy it. This item is for the carries to use. The Courier is a vital part of the team so you wouldn’t need to go back to base to purchase items. Any second the carries spend away from their lanes are time spent by enemies to grow.
Take two Healing Salve for 110 Gold each. These are also not for you but for you to activate on your carry. Do not argue that you are using a hero with healing abilities! The more healing options you have, the better! Take one Tango for 90 Gold. This is also for your Hard Carry. Take an Observer Ward for 50 Gold. Plant this immediately by the river from your side of the Jungle. So far, you’ve spent 410 Gold on stuff you wouldn’t use on yourself.
Healing Salves stacks together to take up only one inventory slot at a time, same applies to Tango. You now have two slots used out of six. A deployed courier will not be found in your inventory anymore. You have four slots remaining with three extra slots in your backpack.
Now, as for your own items, take one Iron Branch for 50 Gold. This twig is all the Attribute item you can afford at the moment. Turn that into a Magic Wand, which is a core item for supports who really need mana. Take two Clarity Potions for 50 Gold each. These stack together in a single slot like the Healing Salve.
Build your Magic Wand early then focus on other utilities such as more Observer and Sentry Wards, Smoke of Deceit, and Dust of Appearance. These will be where your savings should be spent until mid-game
Early Game
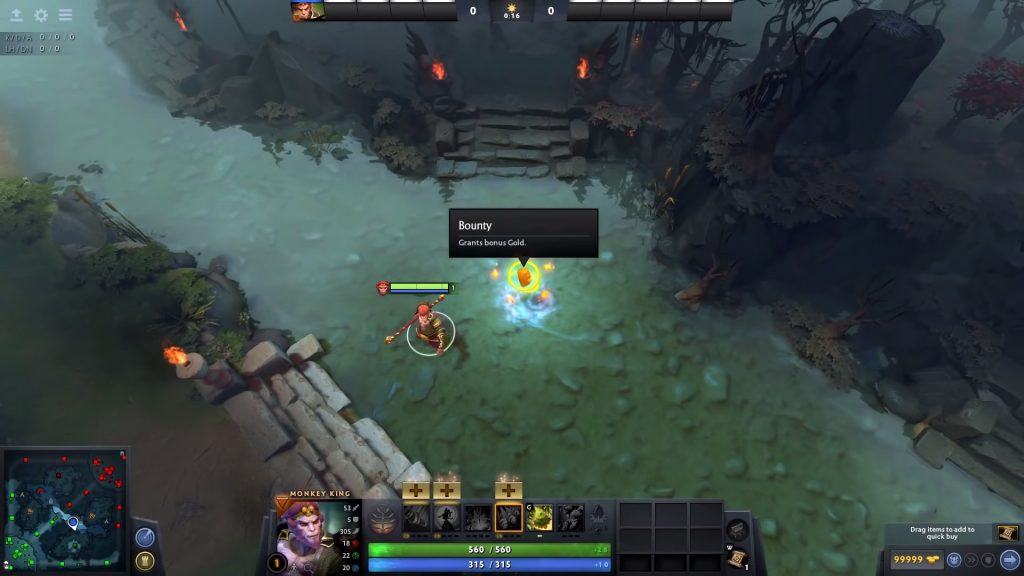
Take the bounty rune as early as you can. You may need to take your Hard Carry with you. Some players tend to be aggressive, attempting to take bounty runes from the enemy’s side of the river. If your opponents are like that, they are most likely to try to bully you with the offlaner, and utility support. Plant your ward by the river bank to increase vision. Don’t put your ward on the river itself because it won’t reveal an area from higher ground. Harass enemy heroes that ever dare cross that river and take your Rune as soon as it appears.
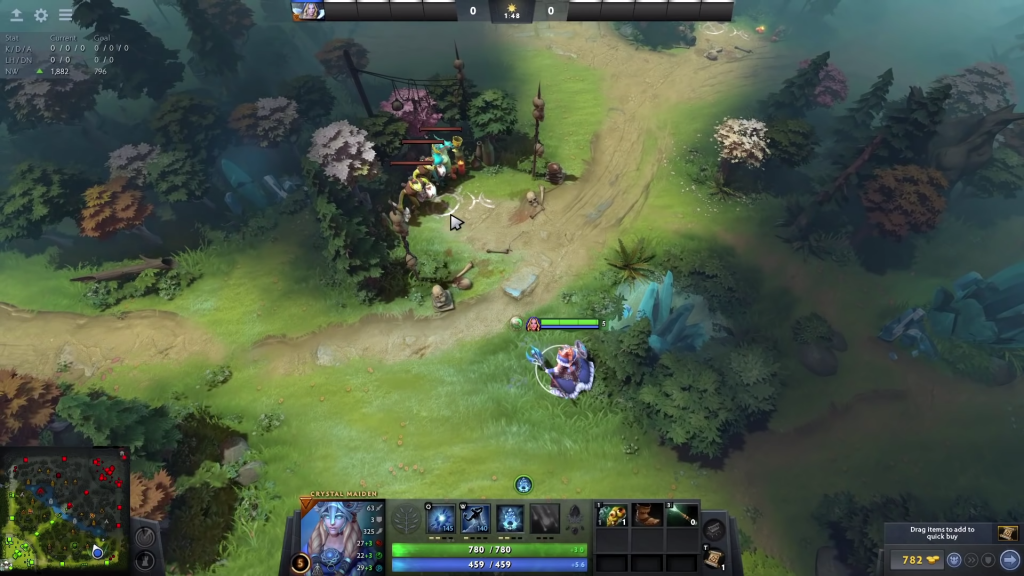
Once you get the rune, proceed to meet your lane creeps. Attempt to block your soldiers to make the lane meet as close to your tower as possible. Once the forces of both sides meet, leave your Hard Carry so he could take all the money and experience from dead creeps. Trust that they know how to last hit. If they could not manage that, no worries. They are not likely to be contested for creep kills near the allied tower.
Keep the lane near your tower by delaying the next wave of creeps with neutral camps. Near your Tier 2 tower is a small neutral camp you can attract to meet your lane creeps. Pulling creeps is always a good decision whether you are winning or losing the lane. The main idea is to deny the enemy Offlaner experience and gold while letting your Hard Carry take all the fight within the Tier 1 Tower. This also gives you the perfect opportunity to gain gold and experience for yourself without contesting with your partner.
Since the Jungle is relatively far from Towers, Offlaners and Utility Support may get frisky and decide to contest you for creep kills. They may be tempted even more if your lane creeps are fighting large camps, which are close to the side, just off the river. You can direct your attention towards the enemy heroes instead of the creeps. Call your Hard Carry to your side, this might just end with a kill.
If enemy heroes are absent, you can purchase a Magic Stick from the Side Lane Shop in preparation for the Magic Wand. If you plan to build Arcane Boots soon, or you are just really hungry for mana, you can also buy an energy booster from the same shop. Use the courier to stack yourself up with Smoke of Deceit, Observer and Sentry Wards, and mana items.
Continue Pulling neutral creeps until your carries are ready to push against towers. You can also stack Neutral Camps by pulling current occupants away from camp range and wait until they return. Offer stacked camps to your Hard Carry if you are confident they can clear them all.

Mid-Game
You should be ready to take on multiple enemies beyond the 10-minute mark. Carries will be itching to take objectives in the mid-game. Nobody expects much damage coming from a Position 5 player due to low farm priority, but everyone will still be wary of disables.
When on the defensive, disable the enemy carries going after your fleeing allies. Your carries are still not allowed to die in this stage. Don’t worry about yourself. You can die any time as long as the carries can survive. Neither you nor the Position 4 Support has to worry about the consequences of death unless your death exposes your other allies.
When initiating a clash, secure the enemy Support heroes because those are the units that can counter a set-up. Take the enemies out one by one starting from the least durable hero. The fewer enemies present, the fewer options they have against you. Hunt down other heroes with a carry or two, one hero can be enough to hold back a push if they play well enough.
Among the five members of the group, Position 5 has the highest mana consumption in the game. You must always be ready to activate your abilities. It is easy to overlook one’s mana in a clash. Support heroes always need Arcane Boots to access mana instantly. You can also take a Magic Wand early.
Arcane Boots are typical upgrades among Position 5 players because they restore mana for yourself and allies. The Mekansm works in a similar way but for health. You can have both items and combine them into the Guardian Greaves which can do both for one click.

Late Game
As the position with the most field control, the last state you want to be in is disabled. Protect yourself with Magic Immunity using Black King Bar. The base status is nothing impressive, but the 5 to 10 seconds of magic immunity and 100% magic resistance prevents any chance of counter-attack. Linken’s Sphere is more expensive by just 1000 Gold but the stats are higher, adding +13 to each of your attributes. It can protect you from one targeted spell for every 13 seconds, unlike Black King Bar which blocks all magic-based attacks.
Guardian Greaves is a great item, but its high cost makes it a luxury rather than a core build. You probably won’t be making this with each fight but you’d love to have it in long drawn out matches. This item has a passive ability that gives +2 armour and +4.5 per second health regeneration. These effects become +10 armour and +12 health per second if the hero’s health falls below 20%. Active ability greatly restores mana and health to all friendly units, including you.
If your team is taking the defensive, you can drag the game for as long as you can. Take your time. Sustain the lanes. Keep your Tier 3 towers alive. When playing the long game, Position 5 – Hard Support is the key to a complete turnaround.
Remember how destructive your hero was in the early game? Most support heroes have devastating spells that allow you to harass enemies away from your Hard Carry. Imagine that kind of dominating prowess in the late game.
You can only take so many healing items before you realize that you don’t need more. Once you have your core items with you, you can spend your money on raising your attributes. If your hero deals Magic Damage, take the powerful Scythe of Vyse. This gives +35 intelligence and +10 each for strength and agility. You can regenerate mana by +2.25 more seconds per second. You will also have the ability ‘Hex’ which turns any target hero into a harmless creature, making any hero units useless.
All heroes can be improved with the Aghanim’s Scepter. While this item can already give you +10 on each attribute, this can also change one of your abilities or give you a new one. Treant Protector, for example, will be able to enchant trees for an unlimited number of times. You can virtually enchant the entire map if the game lasts too long. Enchanted trees become wards and an extension of Treant Protector for when he uses Overgrowth. Always read hero descriptions, see what kind of upgrade they can get from Aghanim’s Scepter for it may just win the game for you.
Good Heroes to Start With
Crystal Maiden
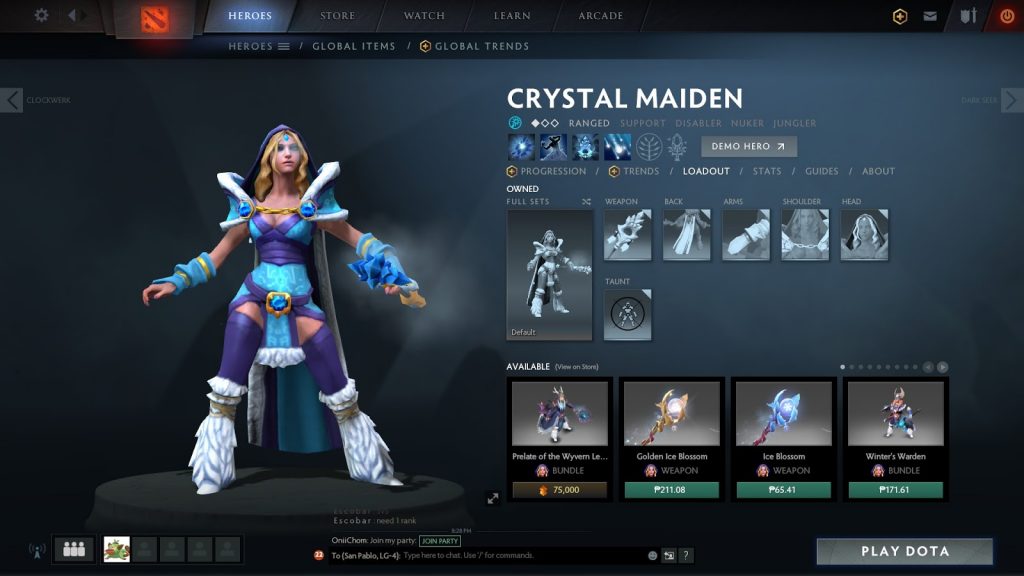
Crystal Maiden is the most popular support hero in the DOTA 2 community. Her abilities are fairly straightforward with good coverage. For as long as she has mana, her presence is undeniable. Enemies teams tend to focus fire against a Crystal Maiden user. She has slow, AoE damage, stun, fast mana regen, and her ultimate makes her difficult to approach.
Crystal Maiden’s Crystal Nova is an AoE blast of 130 magic damage for 130 mana. Enemy units hit by the frost have their movement speed and attack speed slowed down by 20% for 4.5 seconds. Max level deals up to 260 magic damage without Intelligence increase yet and up to 50% can be taken away from the attack and movement speed. This works well for clearing creeps and pushing away enemy heroes in the early game.
Frostbite stops a target for 1.5 seconds on the first level and up to 3 seconds on max level. The frozen unit receives 50 magic damage per 0.5 seconds until the effects wear off. Effects last 10 seconds against creeps level 6 or lower, perfect against summoned units such as Lone Druid’s Summon Spirit Bear.
Both active abilities deal heavy damage and provide good field control. The real selling point is how each takes less than 11 seconds to cool down. The only limit of these abilities are the huge mana costs, each taking more than half of Crystal Maiden’s base mana. Make up for that with Arcane Aura which restores +2.5 mana per second for Crystal Maiden. Nearby allies also benefit for +1 mana per second. Still, consider items to raise her base mana pool around mid-game.
Crystal Maiden’s ultimate is Freezing Field. The area surrounding Crystal Maiden will constantly explode with icy blasts similar to Crystal Nova, damaging and slowing down enemies constantly for over 10 seconds. Affected units lose 60% movement speed while in range.
This ability gives +20 armour to Crystal Maiden but she is still susceptible to high magic damage, pure damage, and stuns. Give her Black King Bar for magic immunity and 100% magic resistance to make her an effective initiator.
Crystal Maiden is praised for her crowd control, not her damage output. Freezing Field is a great initiation ability but Crystal Maiden lacks any natural form of mobility. Force Staff and Blink Dagger are popular items to get in the middle of enemy lines.
To protect Crystal Maiden in the middle of channelling, Black King Bar can only make her more durable. Some consider purchasing Glimmer Cape for a lower price than Black King Bar. Turn Crystal Maiden invisible before her channelling begins.
Dazzle
If you are looking for a low maintenance but high utility hero, get Dazzle. He can push and sustain lanes or clear out creeps all by himself. All he needs is a continuous stream of Clarity Potion. Dazzle lacks stuns and purge, but he can keep allies alive while simultaneously hastening enemy death.
Poison Touch is a wide AoE that pierces magic immunity. All affected units are given a debuff that deals damage over time and slows for a few seconds. Duration resets when the afflicted gets attacked. This is the ability you want to abuse when clearing out lanes and stacked jungle camps.
Save your aggressive Hard Carry with Shallow Grave. The affected target cannot be killed for 5 seconds no matter how lethal an attack can be. This ability works on only one target at a time. With Aghanim’s Scepter, Shallow Grave becomes an AoE ability, allowing you to save multiple allies from certain death.
Aghanim’s Scepter is considered a luxury item due to its high Gold cost but it adds a small contribution to a clash. If the ability enhancement seems tempting, only build this item in the late game. Focus on utility items during the mid-game.
Dazzle’s ultimate is Bad Juju, a passive ability that has two functions:
- All abilities have reduced cooldown duration by 26% at the first level up to 50% at the maximum level. This affects Dazzle’s own abilities and all items in his inventory.
- Each time you activate an ability, Bad Juju reduces the armour of all nearby enemies by 2 for 10 seconds. Duration gets reset and armour reduction effect stacks each time Dazzle activates another ability.
The reduced cooldown allows Dazzle to spam his abilities one after another, effectively controlling the field from a considerable distance. The only limit for you in this late game is Dazzle’s mana pool. Magic Wand is considered a necessity for most Dazzle players both because of his potential and the fact that he is a support hero.
Shadow Shaman
The Hard Support role should be geared towards helping allies. Because of that, support heroes are often seen as sitting ducks if found alone. Shadow Shaman breaks that stigma as the most lethal hero in this list.
The first ability, Ether Shock, is an instant flash of electric bolt affecting all enemies within a cone towards a targeted direction from Shadow Shaman. The wide AoE, high damage, and relatively low cooldown make this ability a great lane push and harass ability.
Hex transforms an enemy unit into a harmless, slow creature. All abilities are disabled including basic attacks. Use this ability to counter a delayed activation or channelling spell. This also stops Spirit Breaker from his Charge of Darkness, rendering him completely defenceless for less than 3 seconds.
Shackles is a channelling ability that binds an enemy immobile while also dealing damage over time. The snared enemy cannot use abilities or attack and they are rooted in place until you decide to break the bind or until effects wear off.
Mass Serpent Ward is Shadow Shaman’s ultimate that summons 10 glowing, stationary snakes with ranged-attack. You can dictate where the serpents should focus their attack for maximum efficiency. Each individual summon is immune to magic damage and takes 2 hits to be destroyed no matter how high an enemy’s attack damage is.
Shadow Shaman’s Ultimate is what makes him a considerable push and potential carry. You can use Mass Serpent Ward against enemy towers for an early lane push. When up against an enemy hero in a 1 versus 1 setting, use Hex to disable any form of response then cast Mass Serpent Ward. Use Shackles on the enemy to make them completely helpless against the Serpent Wards. Not many heroes can survive that combo, but if they did, Ether Shock deals enough magic damage to land the killing blow.
I talked about how Shadow Shaman is an effective killer rather than support, but those combos are only useful against single opponents. Shadow Shaman’s team fight tactic is to isolate the enemy’s support. In the early game, using shackles on an enemy helps secure an easy kill for your hard carry. Ether Shock is used for clearing out creep waves while Hex is used to disable enemy initiators.
Shadow Shaman lacks mobility so you may consider buying a Blink Dagger in the late game or mid-game. But instead of mobility, you may consider Aether Lens which increases all targeted spell cast range. All of Shadow Shaman’s abilities are targeted abilities.
Treant Protector
If you want more durability, try a walking, sentient tree. Treant Protector is a selfless protector and a scary jungler.
Nature’s Guise turns this massive living log invisible for as long as he is close to trees, or even just one tree for that matter. Treant Protector’s movement speed increases by 20% or more until revealed. Attacking an enemy while invisible also causes a bonus physical damage and roots the affected unit for a short moment.
Treant Protector can plant a Leech Seed on a target enemy that slows down movement speed and drains health for 5 seconds. Drained health gets transferred to friendly units or to Treant himself, whichever is closer to the afflicted unit.
Surround a friendly unit with a Living Armour that grants a bonus regeneration while also blocking a small amount of damage. This armour also blocks pure damage and magical damage. You can protect structures with Living Armour, giving towers the same benefits of protection and regeneration.
Overgrowth is Treant Protector’s ultimate ability which enmeshes nearby enemies. Affected units will be unable to move, blink away, turn invisible, or attack until effects wear off after 3 to 5 seconds.
With the addition of Aghanim’s Scepter, Treant Protector will be able to enchant trees, granting allies vision over a small space. There is no limit to how many trees can be enchanted and effects last until the tree is destroyed. When using Overgrowth, the enchanted trees also unleash snaring effects against close enemy units as an extension of Treant Protector. Aghanim’s Scepter became an important mid-game build because of the great utility it provides.
Winter Wyvern
If you wish to toy with your enemies, none is more manipulative than the prideful Winter Wyvern. This prideful frost monster works best when taking on multiple enemies at once.
Winter Wyvern’s first ability, Arctic Burn, allows her to fly over obstacles and see farther at night. Her basic attacks now apply a chilling debuff that slows down movement speed and takes away 6% of the affected unit’s current health per second for 5 seconds. This helps kill fleeing opponents or initiate a clash from a distance.
Arctic Burn’s far range and long duration help harass enemies in the early game. Pair up with other AoE
When using Splinter Blast, Winter Wyvern hurls a ball of ice towards a target unit. This skill may seem unimpressive against solo enemy heroes, but the damage is massive and the reduced speed reaches up to 30% lasting 4 seconds.
Cold Embrace encases a target ally or Winter Wyvern herself in a protective glacier. Affected unit is completely invulnerable to physical damage and heals for 3% of the unit’s total health per second for 4 seconds. You can cast this ability on a lane creep the enemy tower is targetting. The tower will keep its attention on the same creeps, giving your waves 4 more seconds of free hits.
Finally, we have Winter’s Curse which stuns a target unit for 4 to 5 seconds. The stun itself is impressive enough, but the real selling point is what it does to all enemy units surrounding the target. For the same 4 to 5 seconds duration, the stunned unit’s allies caught inside the Winter’s Curse area of effect attacks the initial target. During that time, all your allies are free to attack with everything they have, easily killing a group of heroes.
Besides Splinter Blast’s damage, Winter Wyvern has no need for high intelligence attribute. Build items to increase her utility in combat such as mana restoration from Magic Wand and Arcane Boots. Winter Wyvern’s abilities already have considerable range but you can improve that with Aether Lens, which also increases mana regeneration and maximum mana pool.
Take the Cloak early to protect Winter Wyvern from magic damage. Upgrade that to Glimmer Cape so you can have another protection ability together with Cold Embrace.